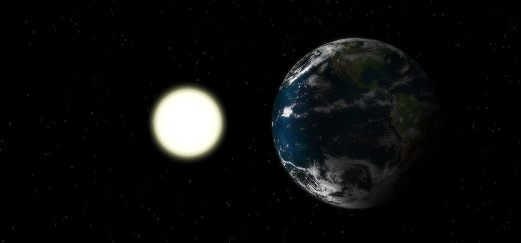
Away3d: experimenting with light and shading

A couple of weeks ago the Away3D team announced the release of version 2.0. The news was accompanied with a stunning demo called Green Planet. I was impressed, so I downloaded the source and started to play with it.
From the start I was interested in checking some light and shading possibilities that Away3D offers. I was not disappointed. It turns out that Away3D has some really nice features and they are easy to use. Not everything is well documented, so I had to opt for a trial-and-error technique, but it is ok, as it was released just a few days ago one cannot expect a full documentation. Click on the image above to see a demo I created. Below I share some hopefully useful tips.
For the light source I use the PointLight3D. It takes as initObject argument where you need to pass its x, y and z coordinates, but also some settings for the light itself. We have a brightness parameter, which is pretty self explanatory, and three others: ambient, diffuse and specular. Now, if you don't have a clue what these are, as it was the case with me, start by reading this. The exact values that those settings can take is not quite clear, but I tried different options and ended up with something like this:
sunLight = new PointLight3D(
    { x:1200, y:0, z:-600, brightness:5, ambient:30, diffuse:500, specular:180 }
);
If you want your bitmap material to react to the light, a basic BitmapMaterial won't do the job. I experimented many materials available in the package and found out that WhiteShadingBitmapMaterial works pretty well. It is straightforward in setup as it just takes a bitmapData as argument. In my code it looks like this:
earthMat:WhiteShadingBitmapMaterial =
    new WhiteShadingBitmapMaterial(earthBmp.bitmapData);
earth = new Sphere(
  { material:earthMat, radius:150,
    segmentsW:32, segmentsH:18, y:0, x:0, z:0 }
);
view.scene.addChild(earth);
The sun does not need to react to any light, for it is light itself. It also does not need any bitmap texture either, so I just use a basic ColorMaterial. But the sun needs to have a glow. And for that I found one super cool feature in Away3D, and it is called ownCanvas. It is a boolean value, and by setting it to true (default is false) you can assign filters to 3d objects exactly the same way you would assign them to regular sprites. Here's how it looks in the code:
var sunMat:ColorMaterial = new ColorMaterial(0xffffff);
sun = new RegularPolygon(
  { material:sunMat, radius:100, sides:32,
    x:2400, y:0, z: -1200 } );
sun.ownCanvas = true;
sun.filters = [
    new GlowFilter(0xffffbe, 1, 12, 12, 3, 3, false, false),
    new GlowFilter(0xffffbe, 1, 12, 12, 3, 3, true, false)
];
A final tip, and this one I found on the Away3D discussion group, is to set the stage.quality to LOW. There is no visible difference in rendering quality, but a huge one in performance. And remember, that you can always check the performance by selecting 'Away3D project stats' option from the right-click menu.
UPDATE May 19th 2008. Source code. I was asked to post the source code of some other examples on the blog and I did it. Later on I thought there is no reason to leave this one behind. So, before anyone asks: the classes are commited to my Google Code account, and there is also a ZIP with the code and the assets here.
